Overview
This article provides step-by-step instructions for enabling NVIDIA vGPU (Virtual GPU) technology and configuring vGPU profiles in VMware Cloud Director (VCD). NVIDIA vGPU allows multiple virtual machines to share physical GPU resources, enabling GPU acceleration for graphics-intensive workloads in cloud environments.
Prerequisites
Hardware Requirements
- NVIDIA GPU cards that support vGPU technology
- ESXi hosts with compatible GPU hardware
- Sufficient GPU memory and compute units for planned vGPU profiles
Software Requirements
- VMware vSphere 7.0 or later
- VMware Cloud Director 10.4 or later
- NVIDIA vGPU software package (Grid/vGPU drivers)
- NVIDIA License Server or Cloud License Service
- Compatible guest OS with NVIDIA vGPU drivers
Step 1: Install NVIDIA vGPU Software on ESXi Hosts
1.1 Download NVIDIA vGPU Software
- Access the NVIDIA portal to be able download NVIDIA-AI-Enterprise-xxx.xxx package. Which is a zip file that contains all the drivers for both the ESXi host and the VM Guest OS.
- Download the appropriate vGPU software package for your ESXi version
- Extract the VIB (vSphere Installation Bundle) file
1.2 Install vGPU VIB on ESXi Hosts
# Enable SSH on ESXi host
# Copy VIB file to ESXi host
# Install the VIB
esxcli software vib install -v /tmp/NVD-AIE-800_570.172.07-1OEM.800.1.0.20613240.zip
esxcli software vib install -v /tmp/nvd-gpu-mgmt-daemon_570.133.10-0.0.0000_24654206.zip

# Verify installation
esxcli software vib list | grep -i nvidia

# Reboot ESXi host
reboot

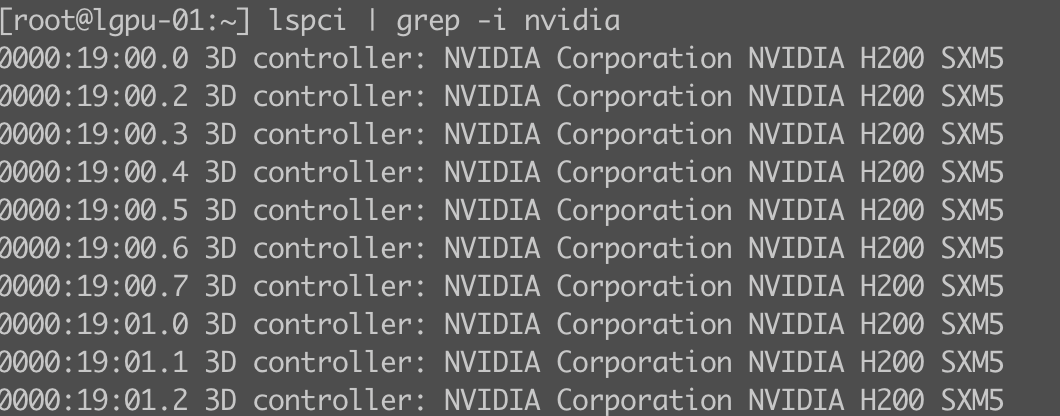
1.3 Verify GPU Detection
# Check if GPUs are detected
lspci | grep -i nvidia

# Verify vGPU capability
nvidia-smi vgpu -c

# Check available GPU profiles
nvidia-smi vgpu -s
Step 2: Configure vGPU Profiles on ESXi
2.1 Enable vGPU on GPU Devices
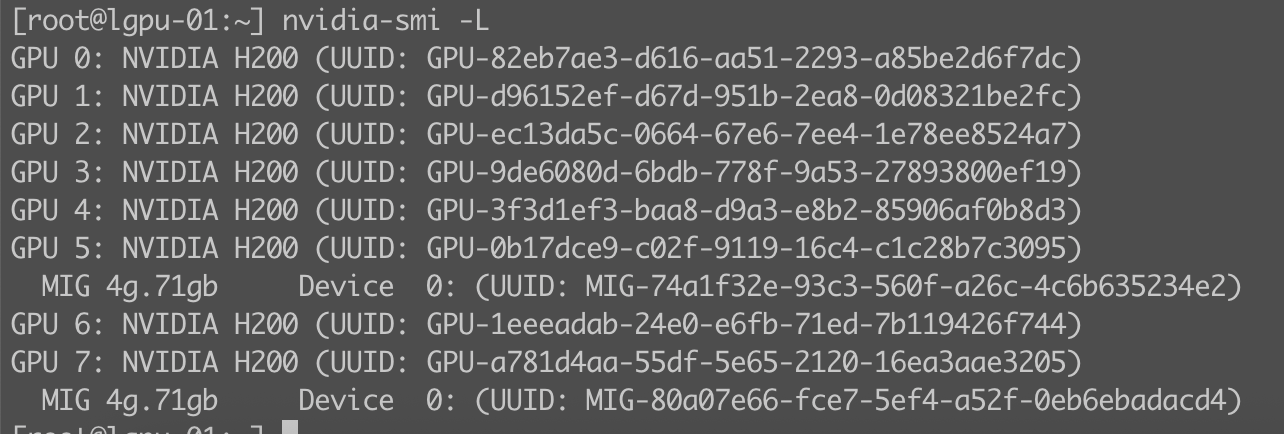
# List available GPUs
nvidia-smi -L

# Create vGPU profiles (example for A100-40C profile)
nvidia-smi vgpu -c 0 -p A100-40C -i 4
You can use default profiles which are created by NVIDIA software installation. They are perfectly fine.
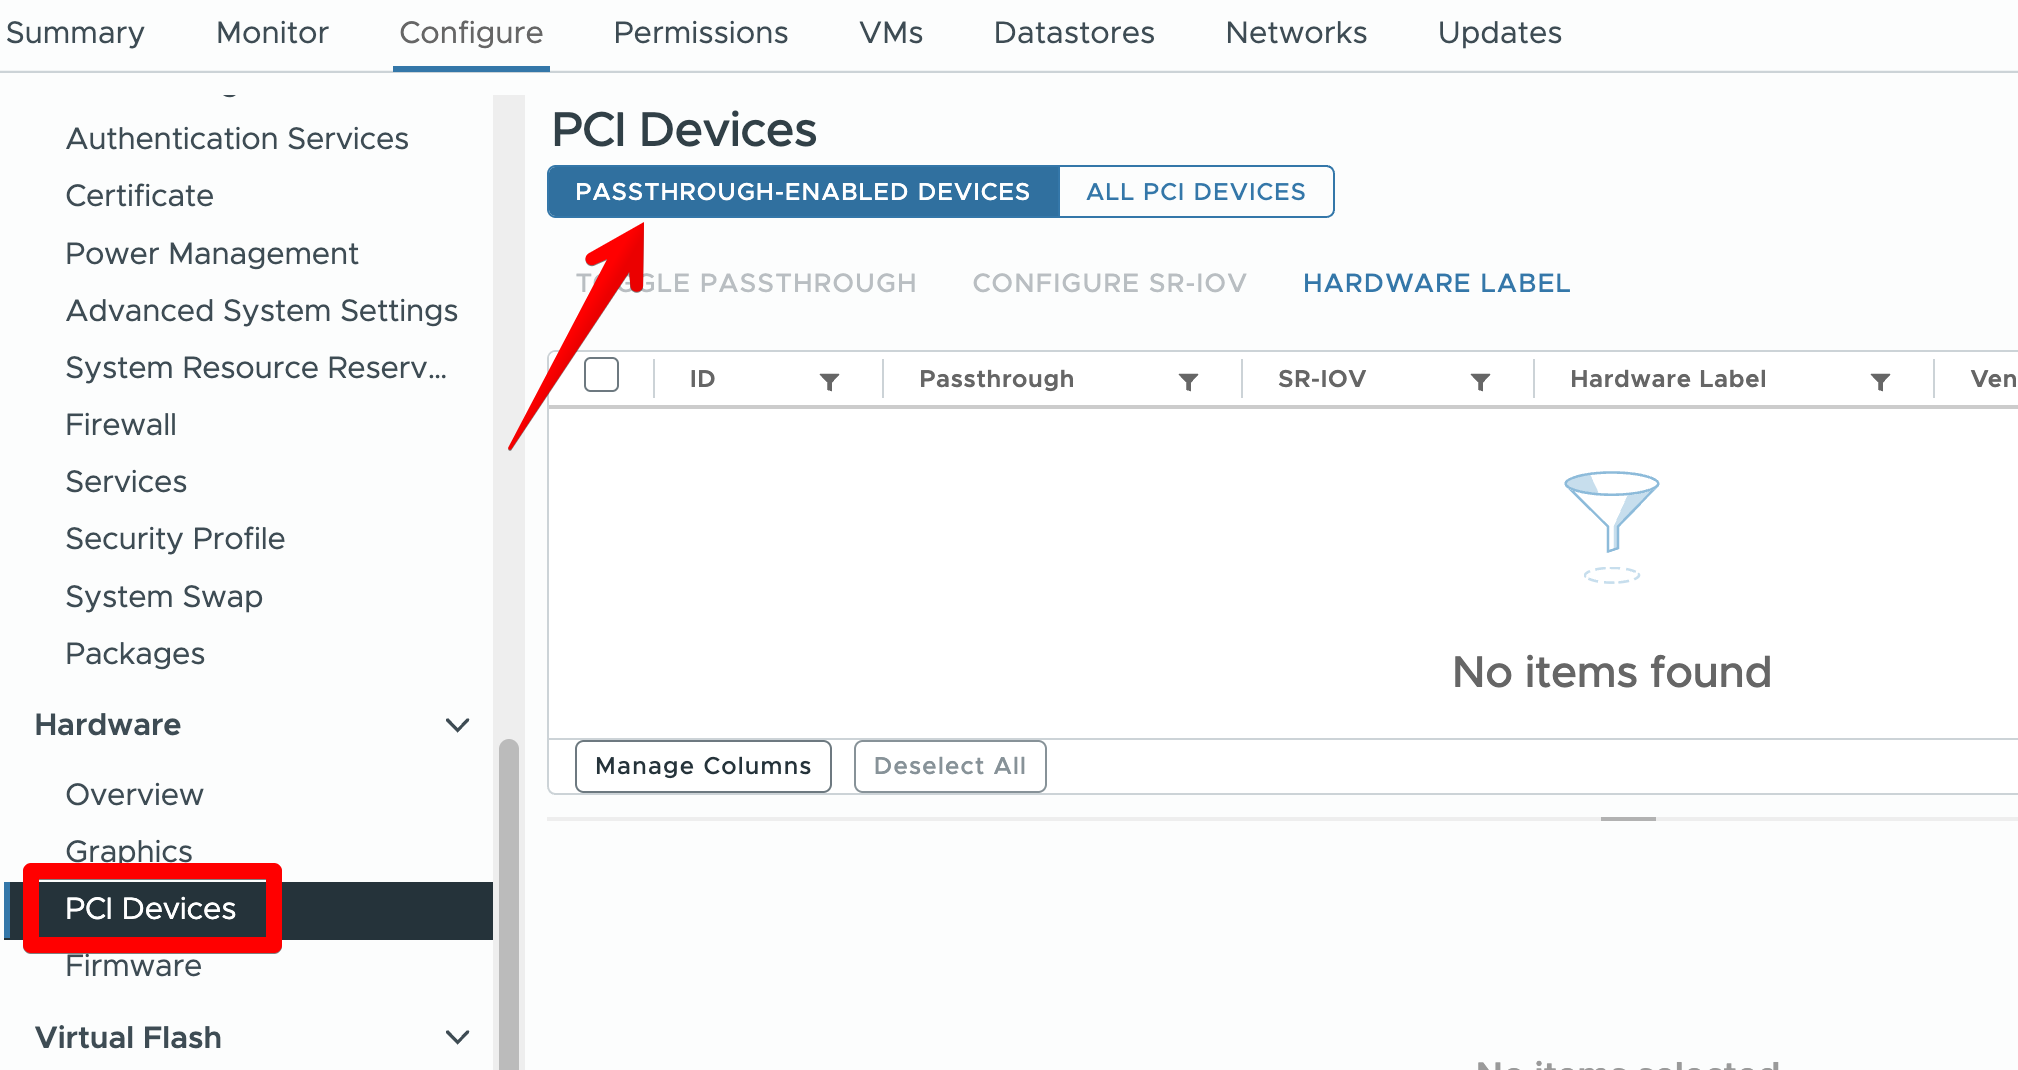
2.2 Configure ESXi Host Settings
- Access ESXi host via vSphere Client
- Navigate to Configure > Hardware > PCI Devices
- Select NVIDIA GPU device
- Click Configure Passthrough (if not using vGPU profiles)
- Restart ESXi host if required
Step 3: Configure vCenter Server
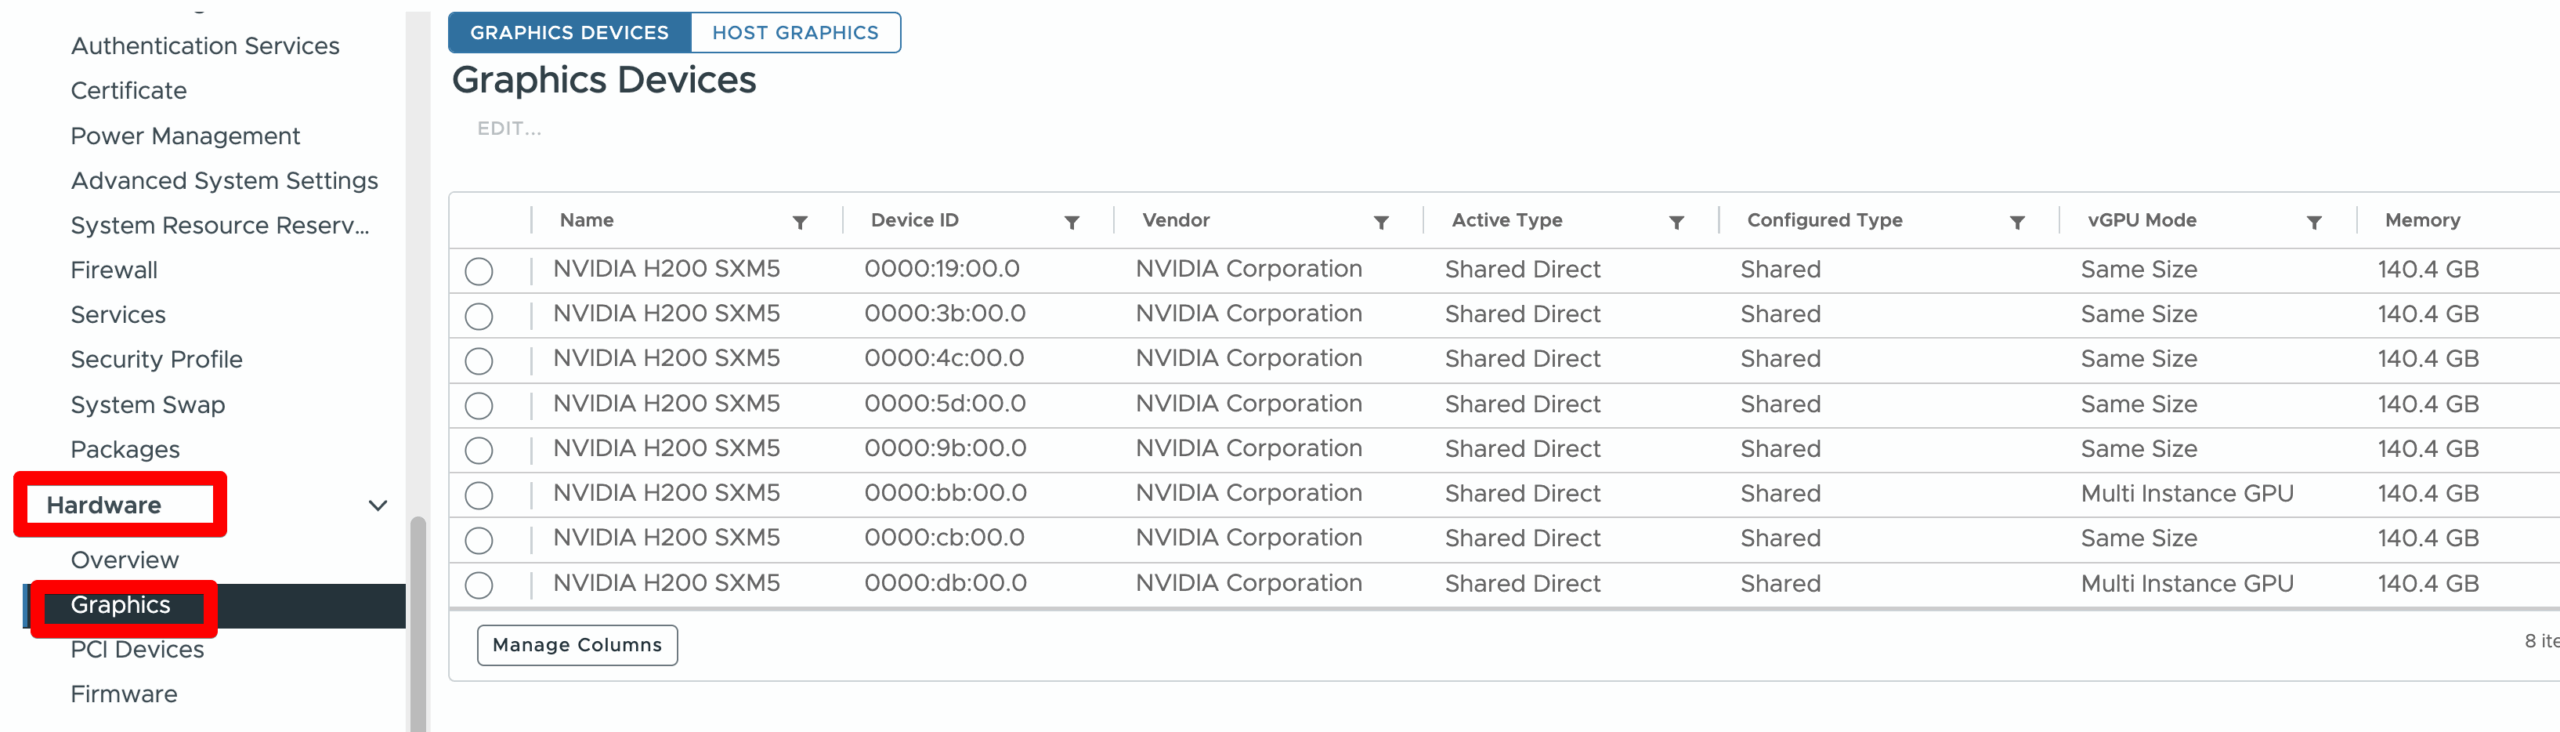
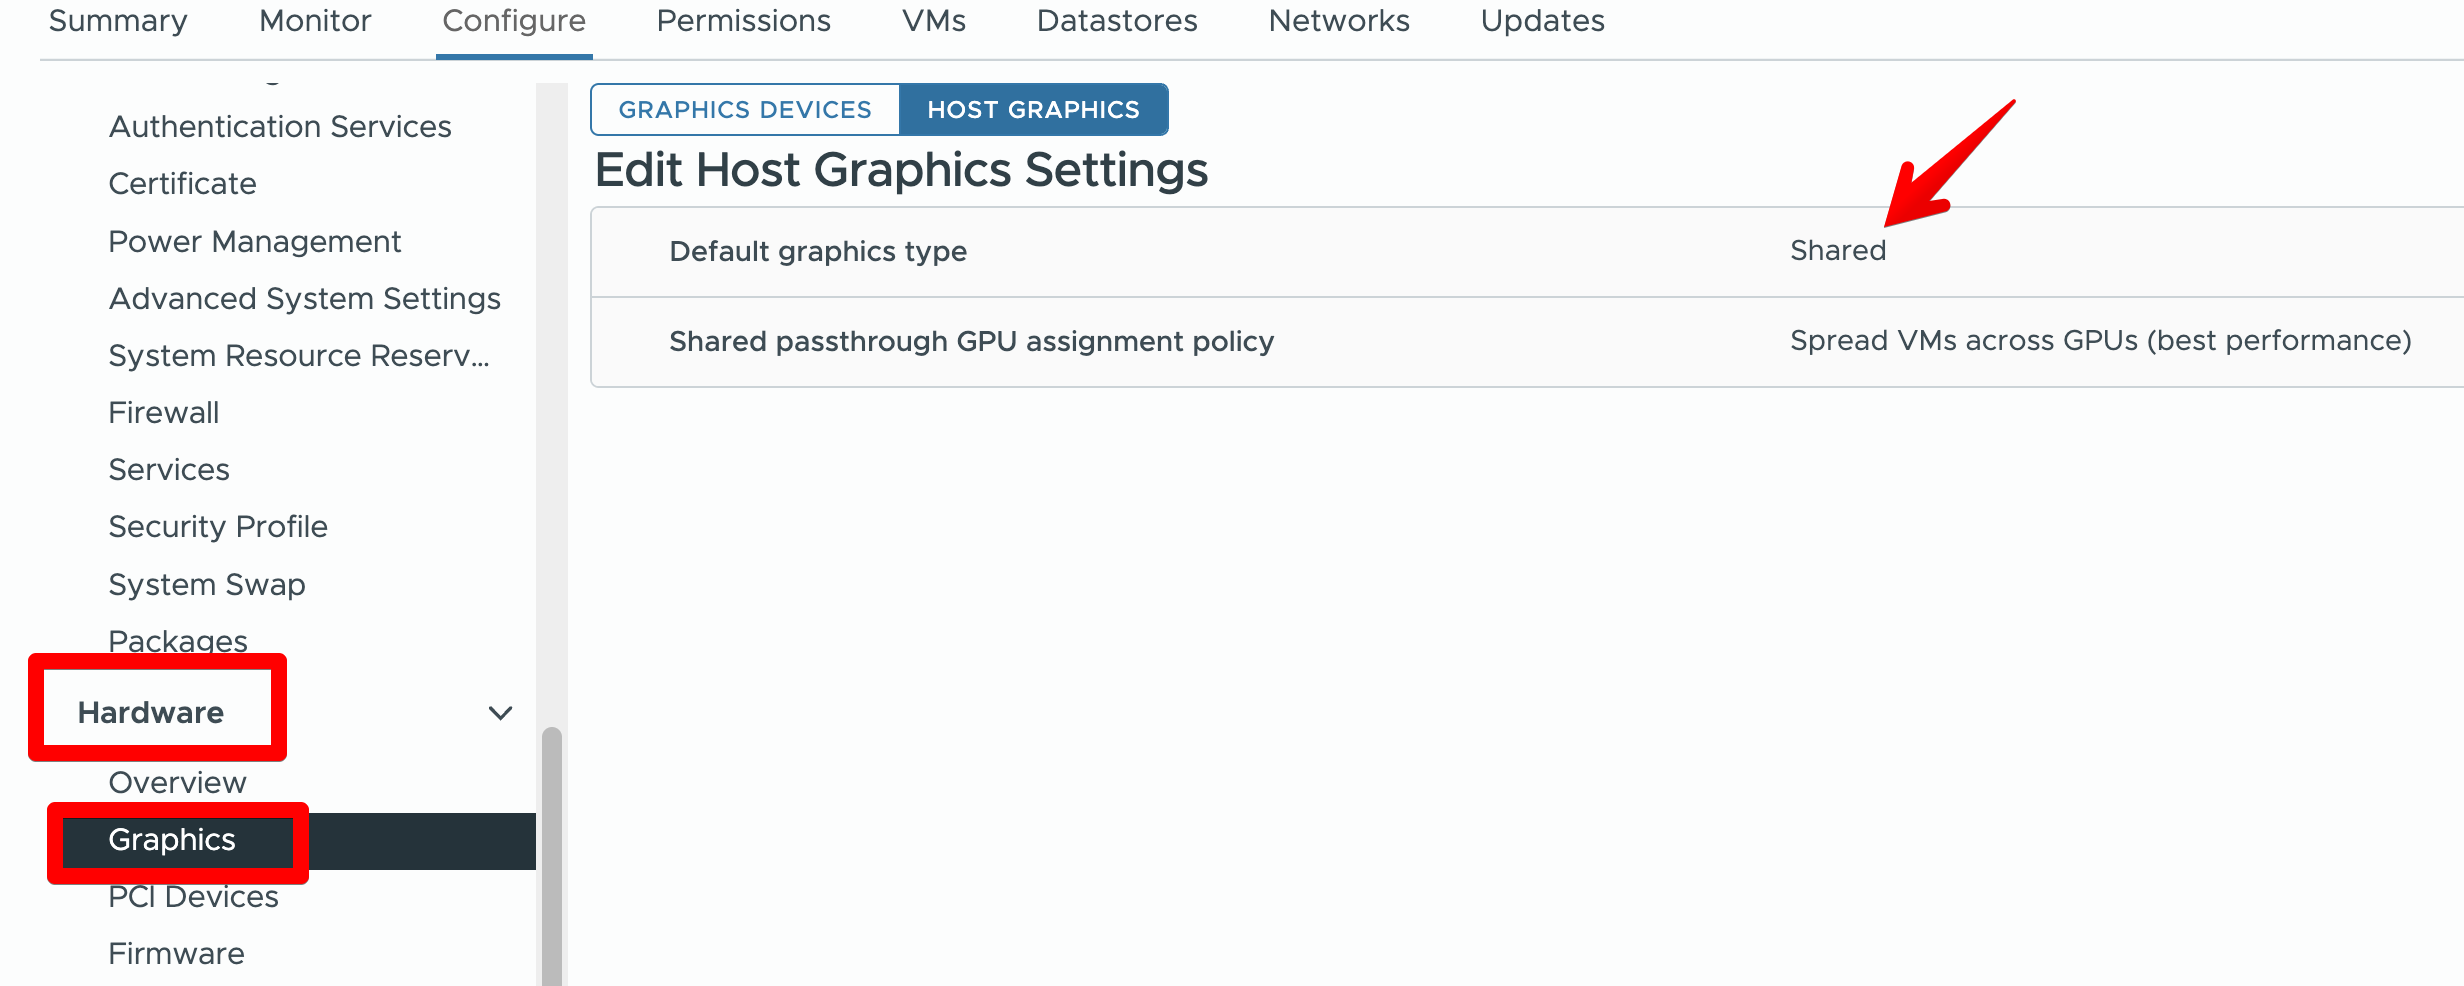
3.1 Update Host GPU Settings
- In vSphere Client, navigate to the ESXi host
- Go to Configure > Hardware > Graphics
- Select Shared Direct graphics type
- Configure Default Graphics Type for VMs
- Apply changes and verify GPU availability
Step 4: Configure VMware Cloud Director
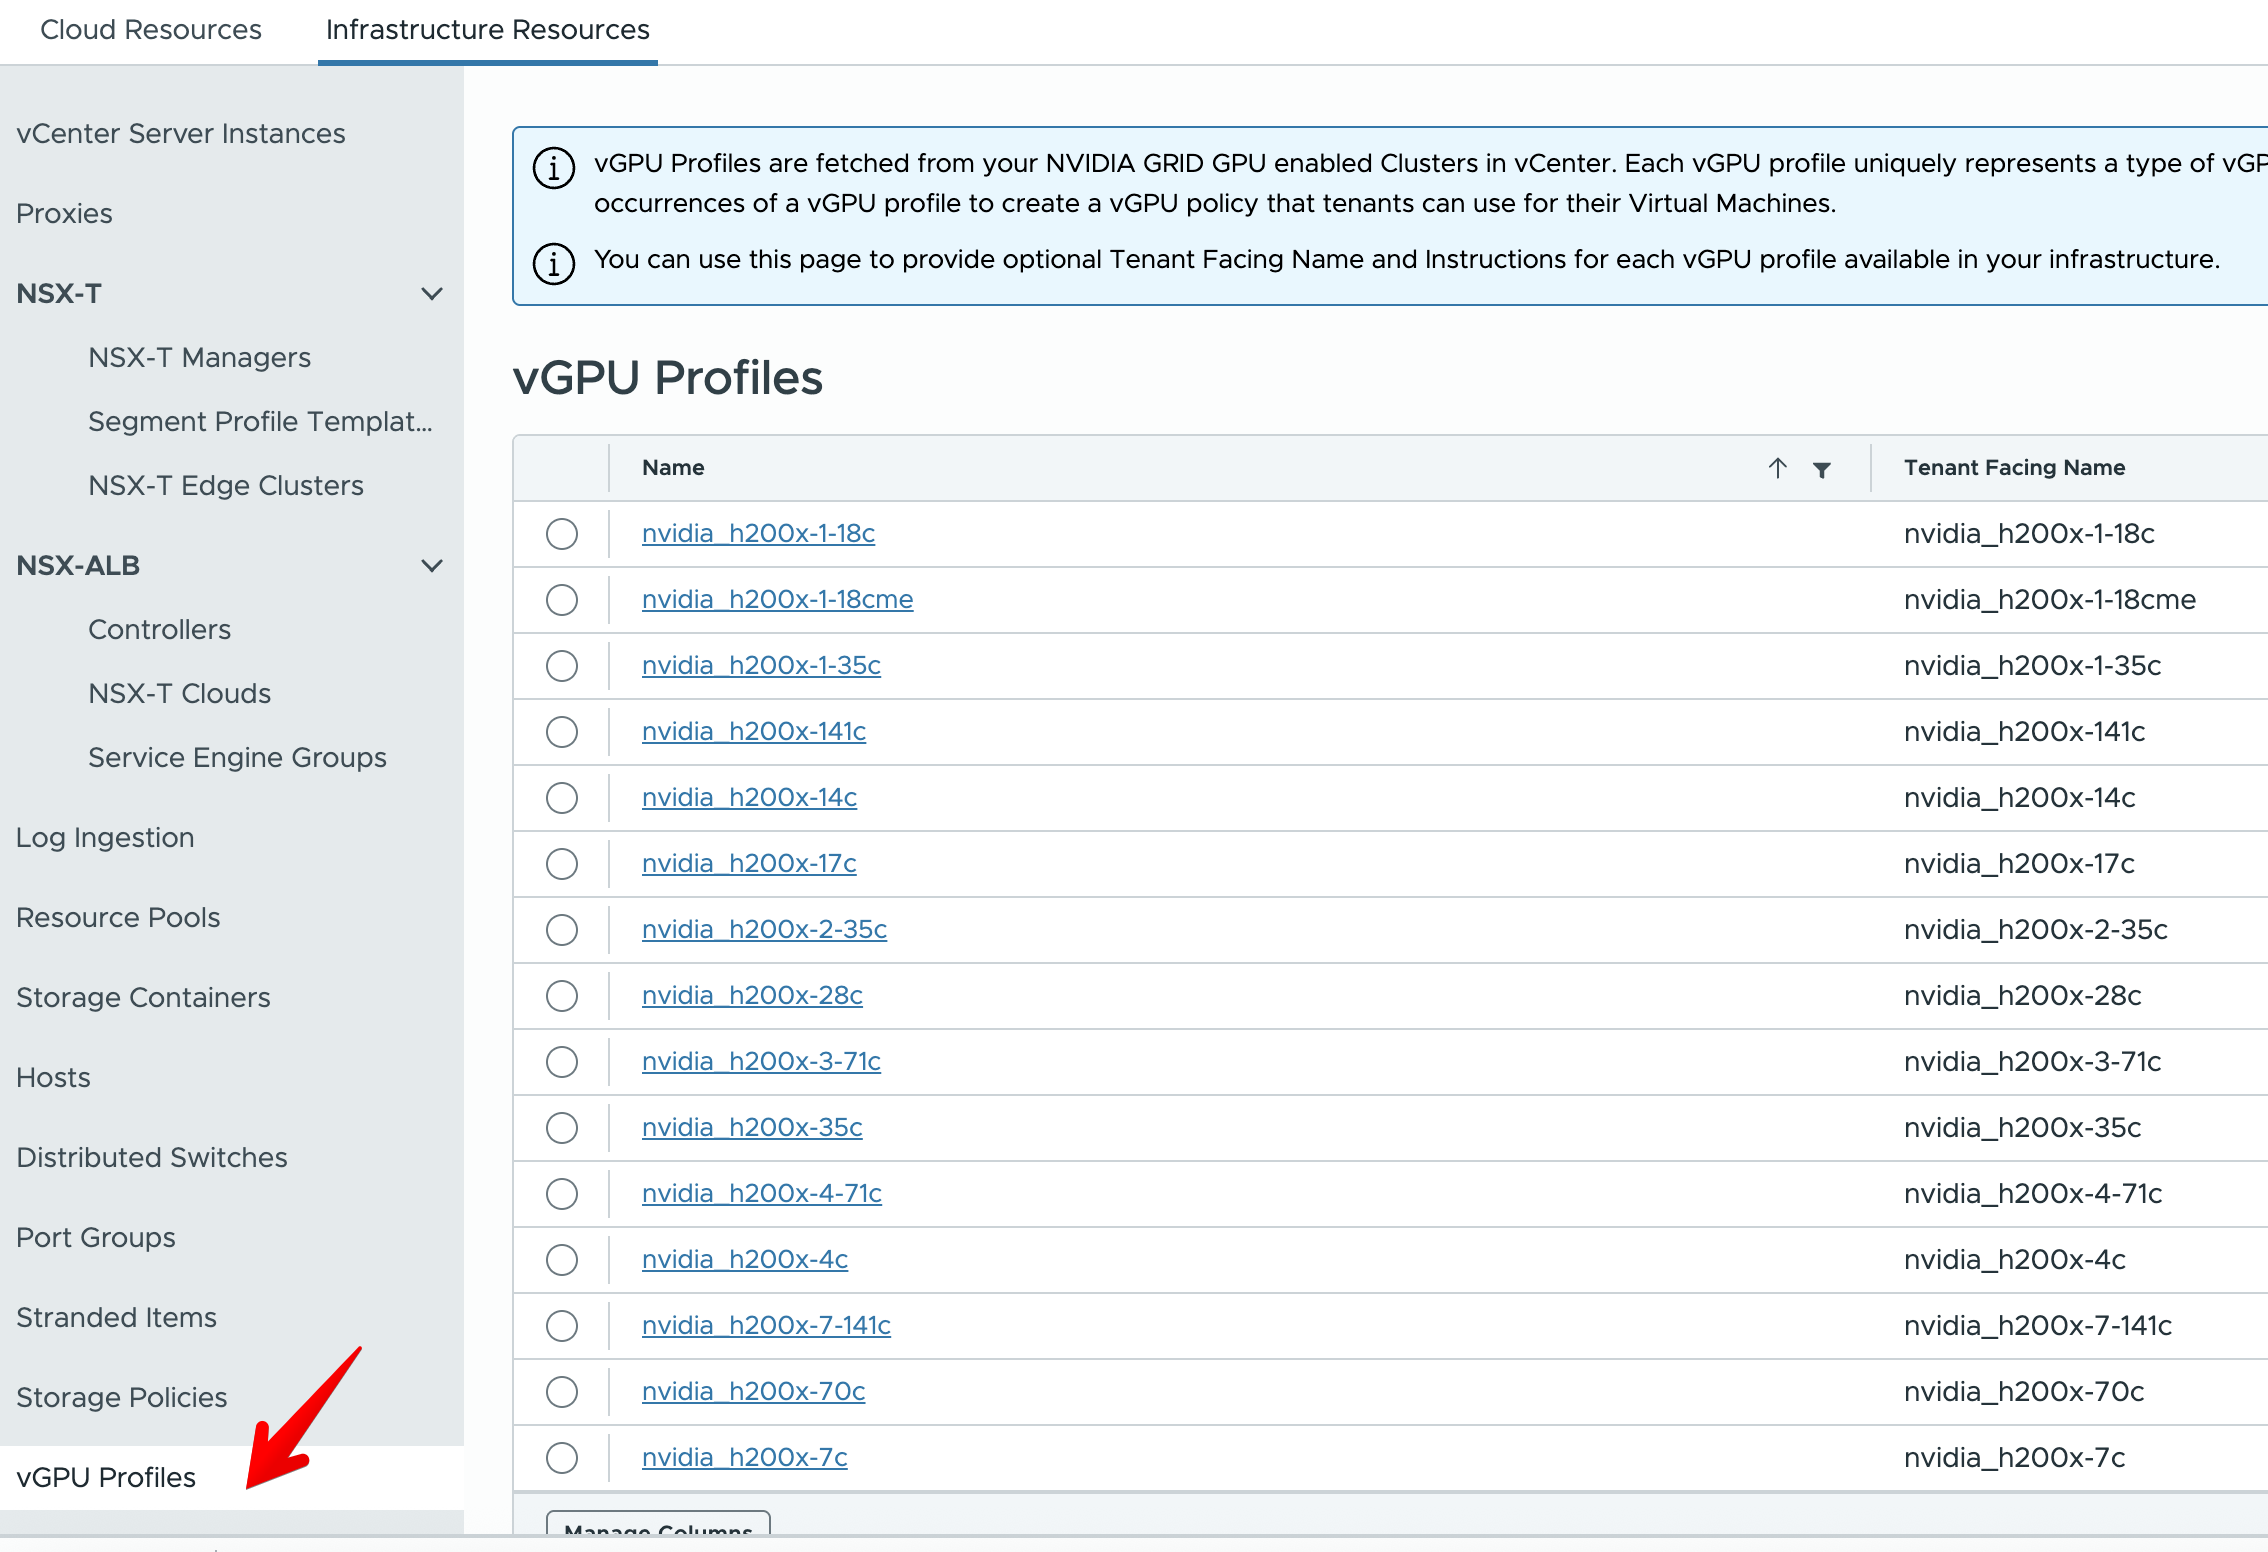
4.1 Import vGPU Profiles
vGPU Profiles are fetched from your NVIDIA GRID GPU enabled Clusters in vCenter. Each vGPU profile uniquely represents a type of vGPU. In Cloud Director, a service provider can use one or multiple occurrences of a vGPU profile to create a vGPU policy that tenants can use for their Virtual Machines.
You can use this page to provide optional Tenant Facing Name and Instructions for each vGPU profile available in your infrastructure.
- Log into VCD as System Administrator
- Navigate to Resources > Infrastructure Resources
- Go to vGPU Profiles
- Select discovered vGPU profiles from ESXi hosts
4.2 Create vGPU Policies
You can use vGPU policies to create a policy that embeds desired vGPU characteristics in the form of a vGPU profile and its count. Additionally you can scope this policy to a set of PVDC clusters or leave it open for all PVDCs. Optionally you can also define VM groups based placement constraints as needed.
You can use NVIDIA GRID vGPU to share a single physical GPU among multiple vGPU devices and provide dedicated compute resources to these vGPU devices.
- Click New to create vGPU policy
- Configure the following parameters:
- Name: Descriptive policy name
- vGPU Profile: Select from imported profiles
- Memory Allocation: Configure vGPU memory
- vGPU count: Set count of GPU
- Click Save
4.3 Assign vGPU Policies to Organization vDCs
- Navigate to Administration > Organization vDCs
- Select target Organization vDC
- Go to Compute Policies
- Click Add next to vGPU Policies
- Select the created vGPU policies
Step 6: Create GPU-Enabled VMs
6.1 Create VM with vGPU
- Navigate to Virtual Machines in tenant portal
- Click New VM
- Configure basic VM settings
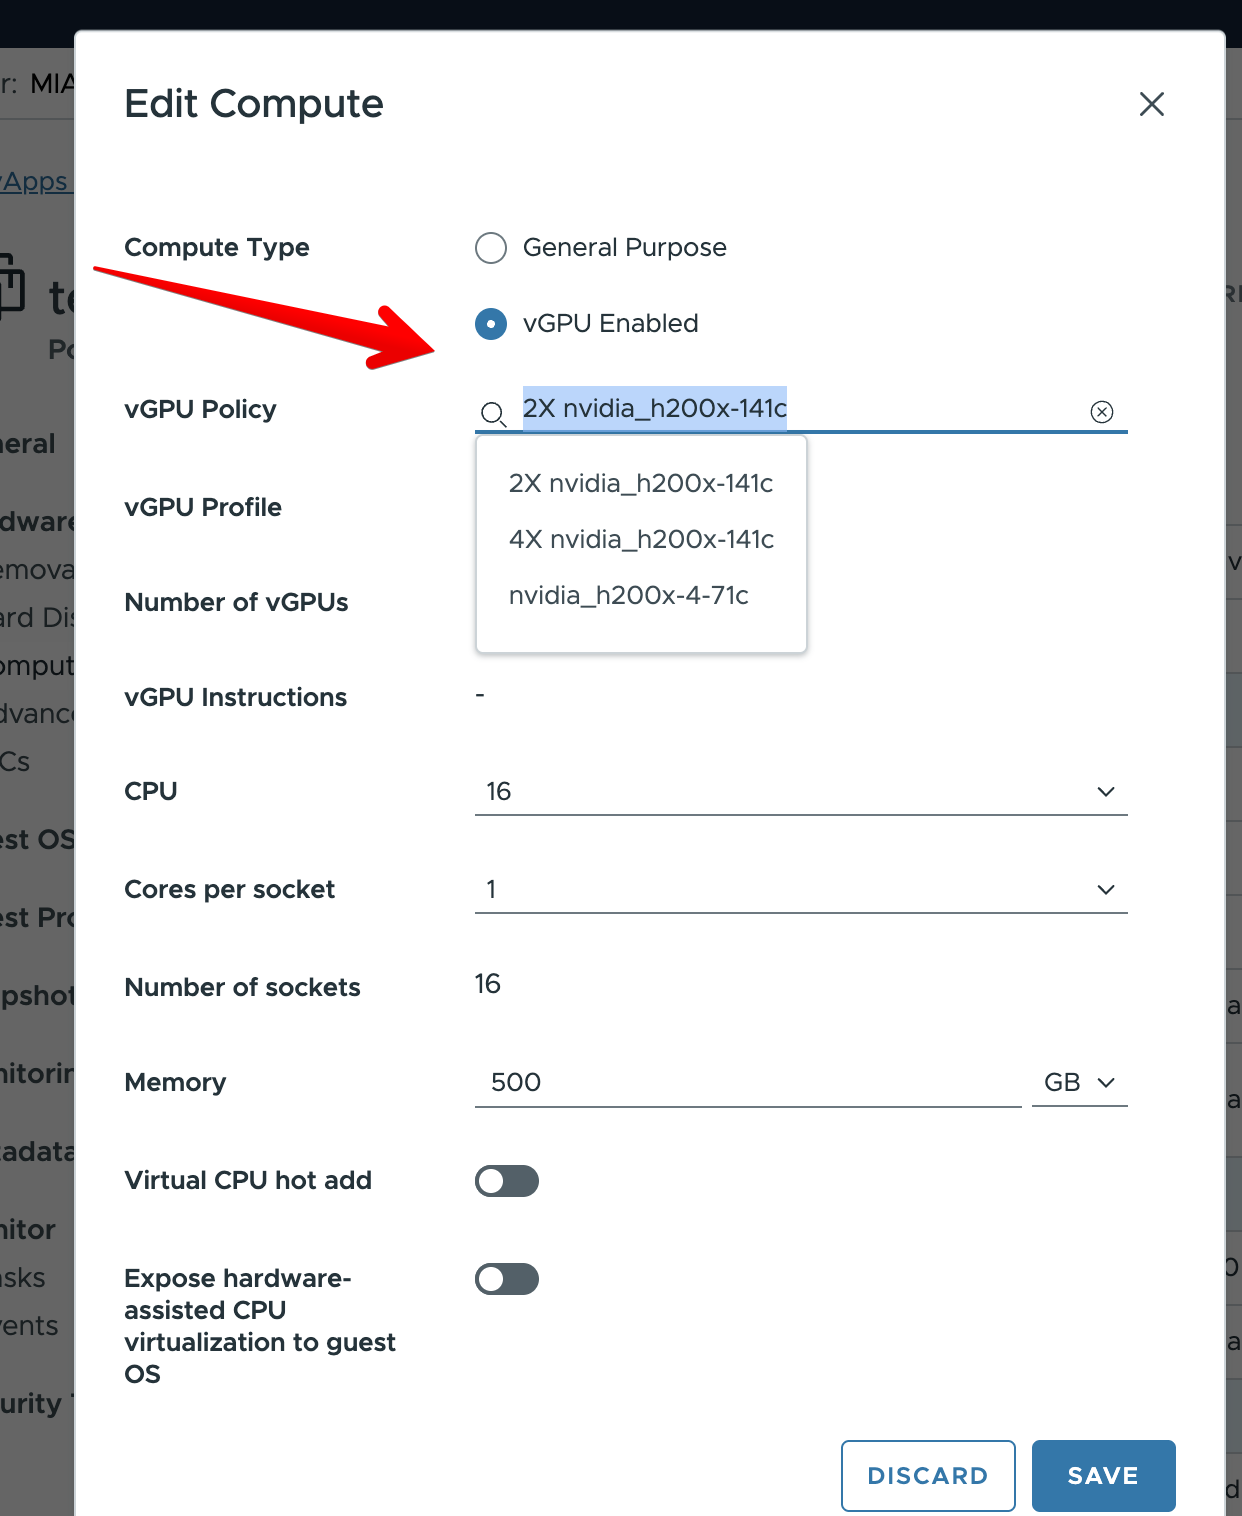
- In Compute section:
- Select VM sizing policy that includes vGPU
- Choose vGPU policy from dropdown
- Complete VM creation

6.2 Install Guest OS and Drivers
- Install supported guest operating system
- Download NVIDIA vGPU guest drivers
- Install drivers in guest OS.
6.3. Install NVIDIA License
Perform this task from the client.
- As root, open the file /etc/nvidia/gridd.conf in a plain-text editor, such as vi.
sudo vi /etc/nvidia/gridd.conf2. Add the FeatureType configuration parameter to the file /etc/nvidia/gridd.conf on a new line as FeatureType="value".
value depends on the type of the GPU assigned to the licensed client that you are configuring.
# /etc/nvidia/gridd.conf.template - Configuration file for NVIDIA Grid Daemon
…
# Description: Set Feature to be enabled
# Data type: integer
# Possible values:
# 0 => for unlicensed state
# 1 => for NVIDIA vGPU
# 2 => for NVIDIA RTX Virtual Workstation
# 4 => for NVIDIA Virtual Compute Server
FeatureType=2
...
3. Copy the client configuration token to the /etc/nvidia/ClientConfigToken directory.
4. Ensure that the file access modes of the client configuration token allow the owner to read, write, and execute the token, and the group and others only to read the token.
a. Determine the current file access modes of the client configuration token.
# ls -l client-configuration-token-directoryb. If necessary, change the mode of the client configuration token to 744.
# chmod 744 client-configuration-token-directory/client_configuration_token_*.tok5. Save your changes to the /etc/nvidia/gridd.conf file and close the file.
6. Restart the nvidia-gridd service.
Step 7: Verification and Testing
7.1 Verify vGPU Assignment
# On ESXi host
nvidia-smi vgpu -q

# In guest VM
nvidia-smi
nvidia-smi -q -d MEMORY
7.2 Test GPU Functionality
- Run GPU benchmarking tools
- Test graphics applications
- Verify licensing status:
nvidia-smi -q | grep -A 5 "License Status"
https://github.com/wilicc/gpu-burn
Related Documentation
- NVIDIA Virtual GPU Software Documentation
- VMware Cloud Director Administration Guide
- vSphere Virtual Machine Administration Guide
Notes Behind
Advanced Settings in VM
VM should have 64-bit OS and EFI boot enabled. Detailed instructions how to create Nvidia Enterprise ready VM can be found here :
https://docs.nvidia.com/ai-enterprise/deployment/vmware/latest/first-vm.html#first-vm
Calculating the value for 64bitMMIOSizeGB
When adding a GPU to a vSphere VM using PCI passthrough there are a couple of additional settings that you need to make or your VM won’t boot.
https://knowledge.broadcom.com/external/article?legacyId=2142307
Finally you have to set up memory-mapped I/O (MMIO) to map system memory to the GPU’s framebuffer memory so that the CPU can pass data to the GPU. In vCenter go to the VM, select Actions > Edit > VM Options > Advanced > Edit configuration.
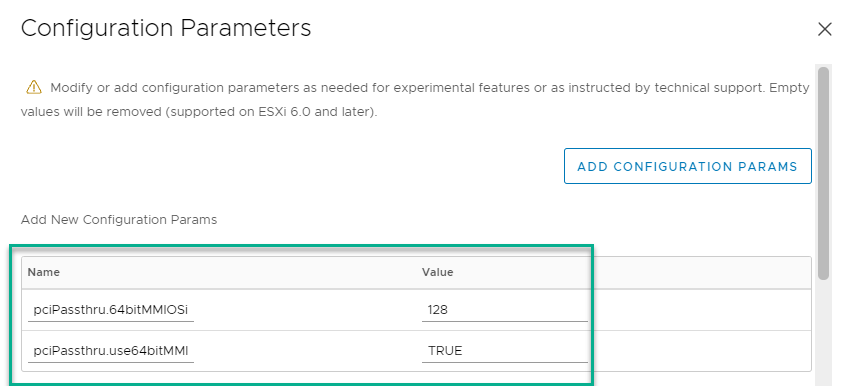
Once you’re on the Configuration parameters screen, add two more parameters:
pciPassthru.use64bitMMIO = TRUE
pciPassthru.64bitMMIOSizeGB = xxx
The 64bitMMIOSizeGB value is calculated by adding up the total GB of framebuffer memory on all GPUs attached to the VM. If the total GPU framebuffer memory falls on a power-of-2, setting pciPassthru.64bitMMIOSizeGB to the next power of 2 works.
If the total GPU framebuffer memory falls between two powers-of-2, round up to the next power of 2, then round up again, to get a working setting.
Powers of 2 are 2, 4, 8, 16, 32, 64, 128, 256, 512, 1024, …
For example, two NVIDIA A100 cards with 40GB each = 80GB (in between 64GB and 128GB), so round up to the next power of 2 (128GB), then round up again to the next power of 2 after that (256GB) to get the correct setting. If you set it too low the VM won’t boot, but it won’t give you an error message telling you what the issue is either.
Adding GPU’s
To add a GPU, in vCenter go to the VM, select Actions > Edit > Add New Device. Any GPUs set up as PCI passthrough devices should appear in a pick list. Add one or more GPUs to your VM.
Note that after adding one device, when you add additional GPUs the first GPU you selected still appears in the pick list. If you add the same GPU more than once your VM will not boot. If you add a GPU that’s being used by another running VM your VM will not boot. Pay attention to the PCI bus addresses displayed and make sure that the GPUs you pick are unique and not in use on another VM.