VMware Cloud Director Encryption Management is a solution add-on which grants tenant administrators the ability to use encryption keys from their own key providers for encryption of virtual machines (with or without vTPM devices), vApp templates, and named disks in their VMware Cloud Director virtual data centers (VDCs).
Setting up Encryption in Cloud Director
- Open the VMware Cloud Director provider portal.
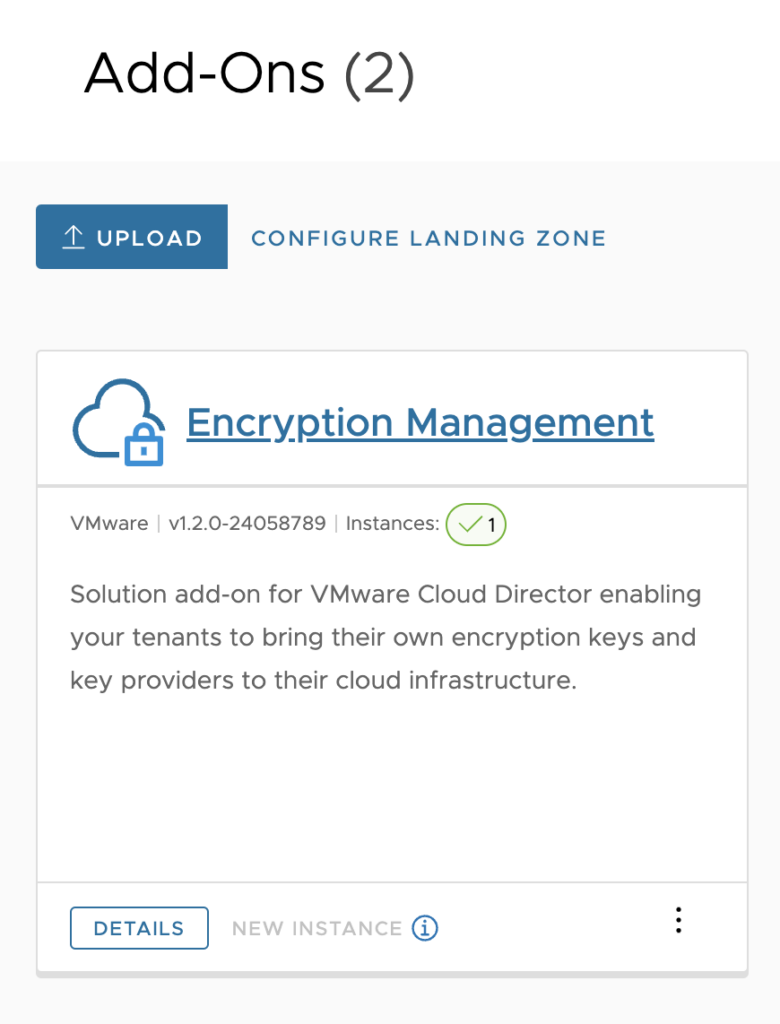
- From the side navigation bar, expand More and select Solution Add-On Management.
- Click UPLOAD.
- Click Browse Files and select the VMware Cloud Director Encryption Management ISO on your local drive.
- Make sure Create add-on instance after upload is completed is checked.
- Click UPLOAD.
- Once the upload is completed, click Finish.
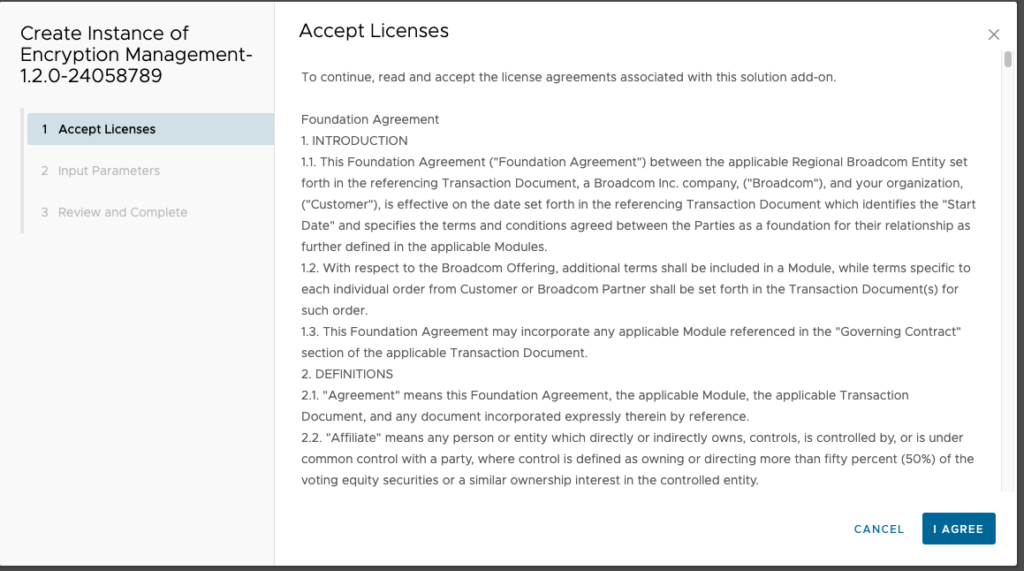
- Accept the VMware license agreement.
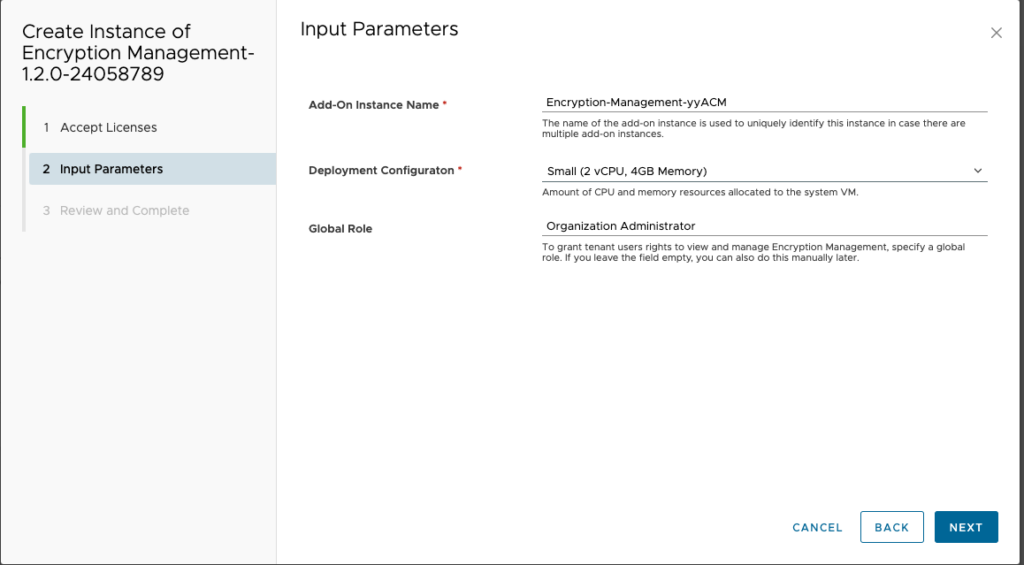
- Enter the solution input parameters.
- Enter a name for the VMware Cloud Director Encryption Management add-on instance.
- Select the deployment configuration.
- (Optional) Enter the name of an existing global role which will be granted full access to VMware Cloud Director Encryption Management.The default global role is the built-in Organization Administrator. If the specified global role does not exist in the system, the solution will still operate but no access is granted to tenants. For information how to grant access after the installation is complete, see View and Edit a Global Tenant Role Using Your VMware Cloud Director in the VMware Cloud Director documentation.
- Click Next.
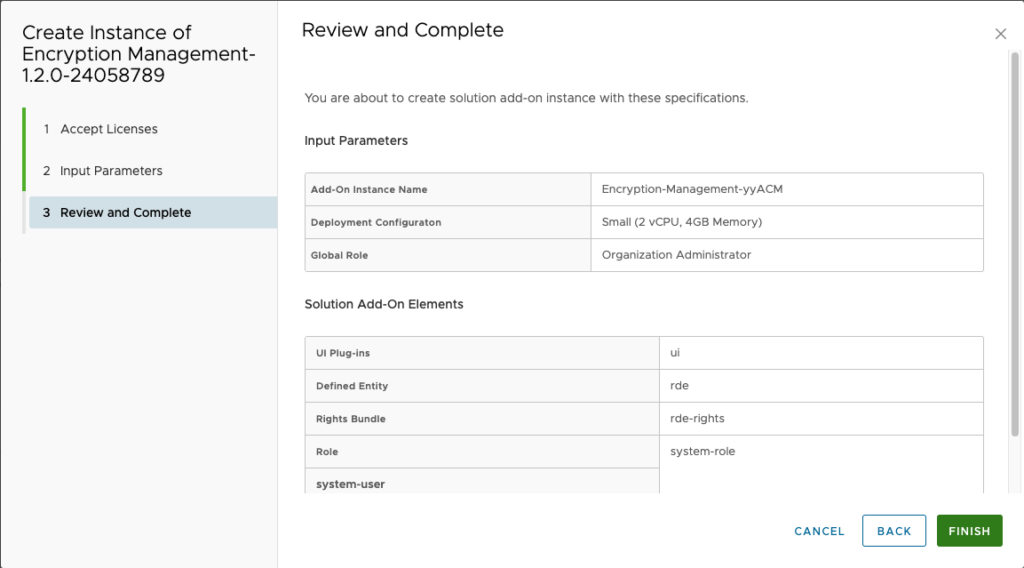
- On the final step of the wizard, review the details and click Finish.


Setting up a Free KMS Server for vCenter
In this post, we will be deploying a PyKMIP server that stores its keys in a database
For this tutorial, we will be using self-signed certs and this keys will be stored in a sqlite database. This is not secure at all! However, it will allow you to evaluate and learn the KMS functions within vCenter.
What we will need:
- Alma Linux distro.
- A network connection to install some packages.
Let’s install some required packages.
mkdir /usr/local/PyKMIP
mkdir /etc/pykmip
mkdir /var/log/pykmip
mkdir /etc/ssl/private/

dnf install openssl-devel bzip2-devel libffi-devel
dnf install python39
dnf install epel-release
dnf search sqlite | grep devel
dnf install sqlite-devel.x86_64
dnf install git
Generate self-signed cert. Then fill out the form for the SSL certificate. The above certificate will be valid for 10 years.
openssl req -x509 -nodes -days 3650 -newkey rsa:2048 -keyout /etc/ssl/private/selfsigned.key -out /etc/ssl/certs/selfsigned.crtNow we need to pull PyKMIP server from git repo.
cd /usr/local
git clone https://github.com/OpenKMIP/PyKMIP
cd /usr/local/PyKMIP
python3 /usr/local/PyKMIP/setup.py install
Also we need to create config file for our server – nano /etc/pykmip/server.conf
[server]
database_path=/etc/pykmip/pykmip.database
hostname=x.x.x.x
port=5696
certificate_path=/etc/ssl/certs/selfsigned.crt
key_path=/etc/ssl/private/selfsigned.key
ca_path=/etc/ssl/certs/selfsigned.crt
auth_suite=TLS1.2
policy_path=/usr/local/PyKMIP/examples/
enable_tls_client_auth=False
tls_cipher_suites= TLS_RSA_WITH_AES_128_CBC_SHA256 TLS_RSA_WITH_AES_256_CBC_SHA256 TLS_ECDHE_ECDSA_WITH_AES_256_CBC_SHA384
logging_level=DEBUG
Replace replace x.x.x.x with your server ip address. Note for the code above, be sure that tls_cipher_suites, with the two TLS_RSA lines as well as the TLS_ECDHE line are all on one line, but separated by spaces.
Now we need to edit our crontab to start the service at startup. crontab – e
@reboot ( sleep 30s; python3 /usr/local/PyKMIP/bin/run_server.py & )This will make sure that it starts automatically on startup. Reboot your VM or type this in to start it as a background process:
python3 /usr/local/PyKMIP/bin/run_server.py &Now we need to go to our vCenter. We click on the vCenter and go to configure. Then under Key Providers, we click “Add Standard Key Provider”.
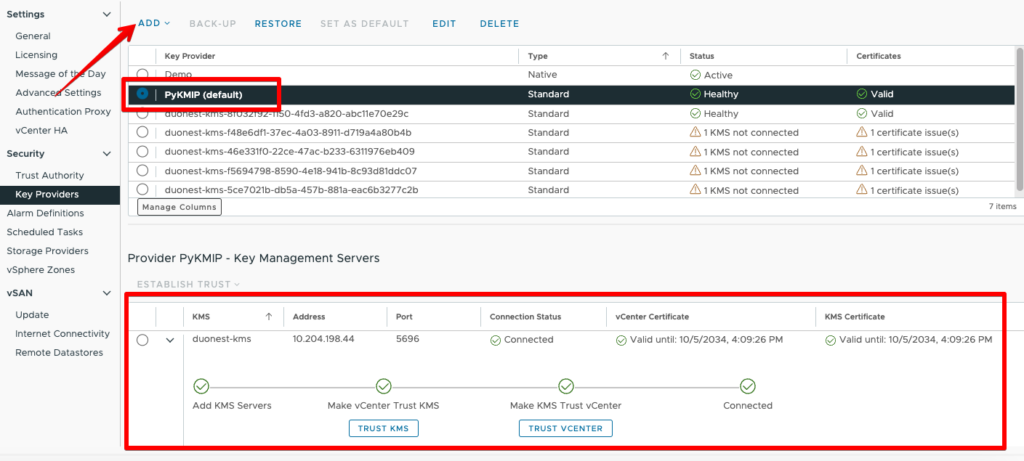
Once you have done that we need establish trust. Click on the Key Provider, then at the bottom click on the KMS server. Click on “Establish Trust” followed by “Make KMS trust vCenter”. Click on “KMS certificate and private key” and then on “Next”.
Now, we need to fill in the KMS certificate and private key. On the server, run:
cat /etc/ssl/certs/selfsigned.crt
cat /etc/ssl/private/selfsigned.key
Now click on “Establish Trust” and we’re done! Now you should be able to use your new KMS server in your lab!
Setting up VCD Part
You register a key provider with VMware Cloud Director Encryption Management and associate it with a vCenter Server.
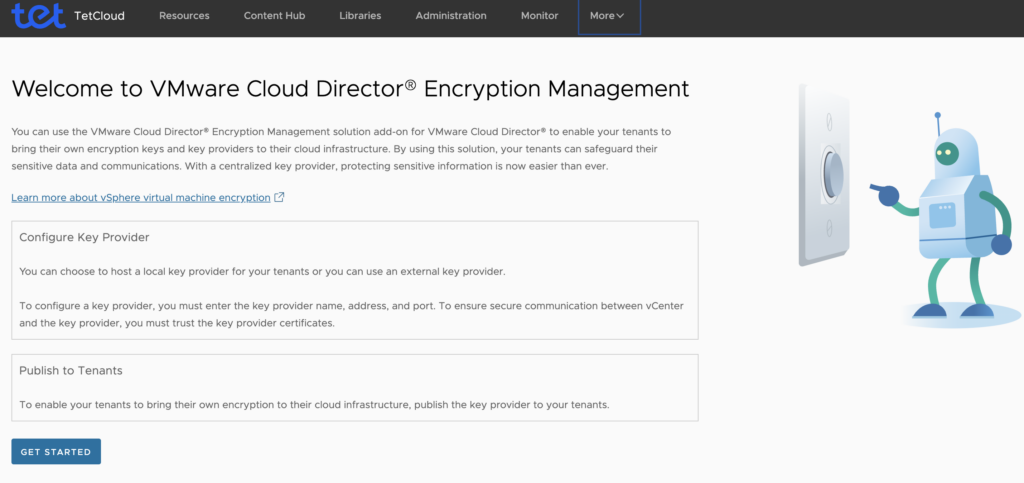
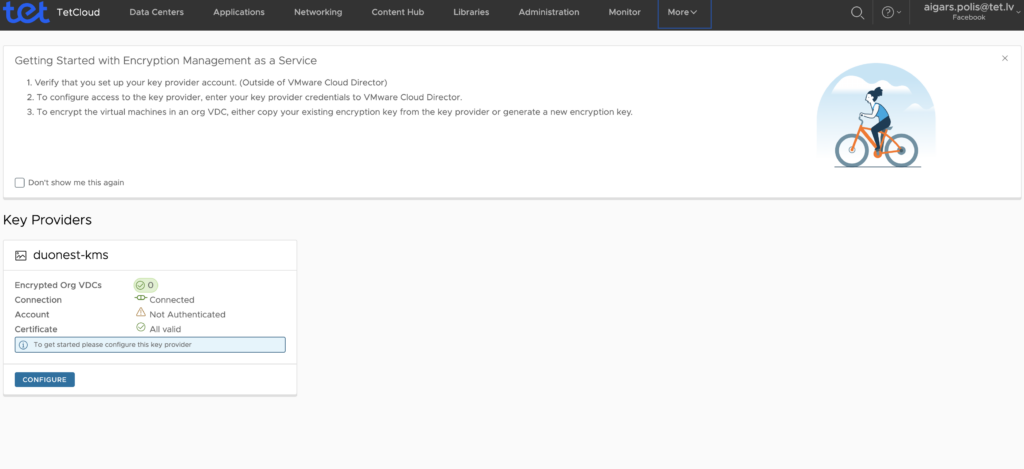
From the side navigation bar, expand More and select Encryption Management.If this is the first key provider you are registering, an introductory page is displayed.
To register a key provider, click Get Started or Register.
Fill in the key provider details.
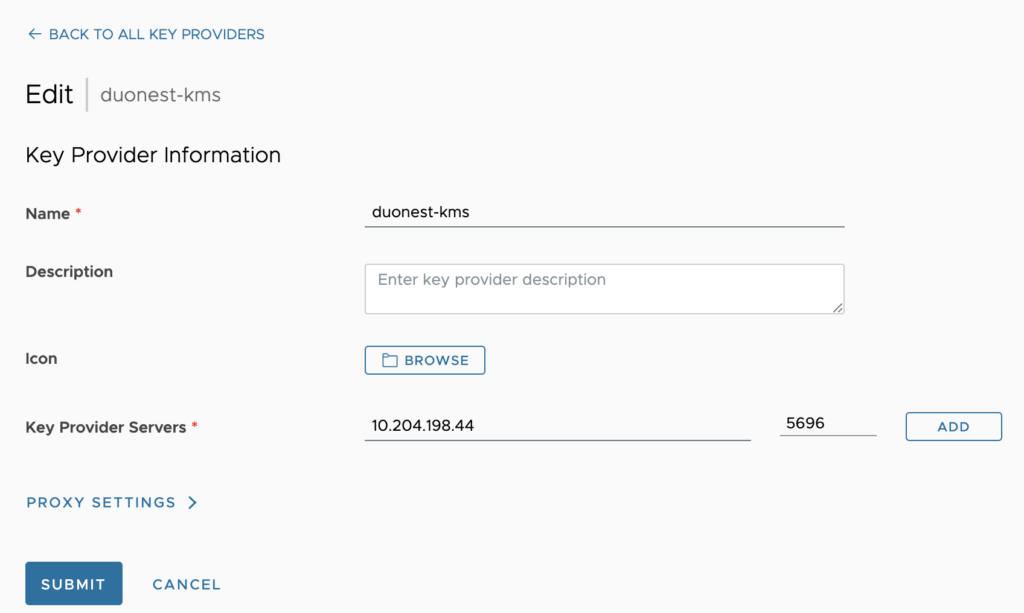
- Enter a key provider name.
- (Optional) Enter a description.This description will be visible to tenant administrators.
- (Optional) To upload an icon from your local drive, click Browse.
- Enter a key provider server IP address and port.
- (Optional) To add more key provider servers, select ADD and enter the server’s IP address and port.Note:Additional key provider servers ensure high availability of the service. The servers must share the same encryption keys.
- (Optional) To set up a proxy, expand PROXY SETTINGS and enter the proxy address and port.
- Click Next.
Select the vCenter Server to be associated with the key provider.If you are registering a key provider with a selected vCenter Server for the first time, you are prompted to enter the vCenter Server username and password.
Click Register.You are prompted to validate and trust the certificates of the key provider servers.
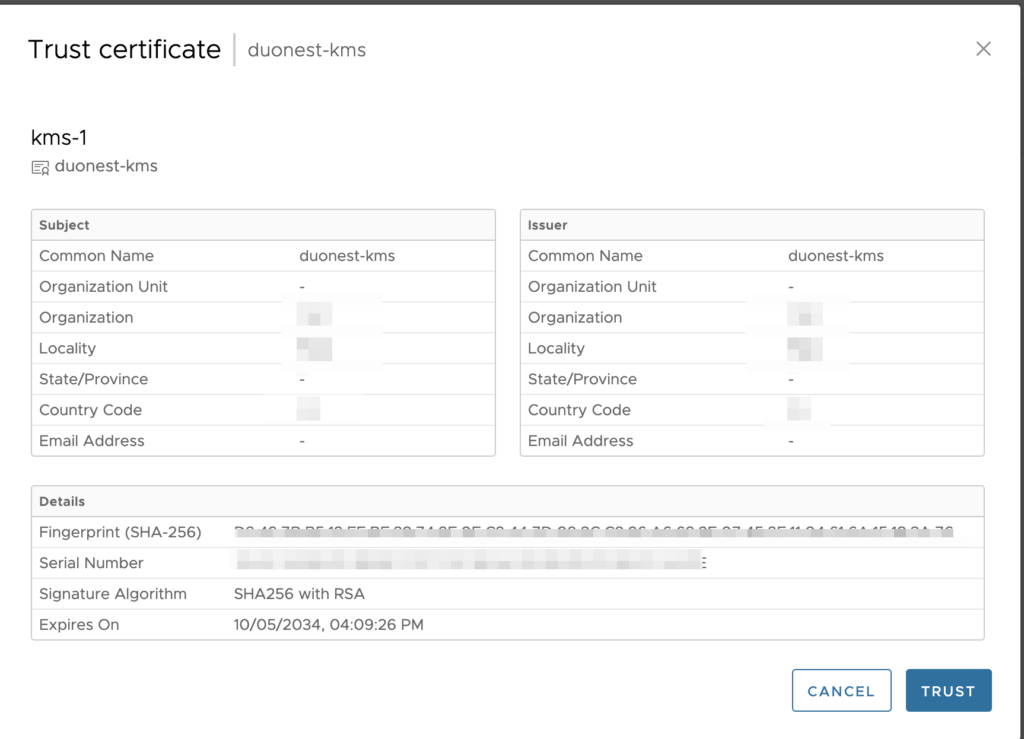
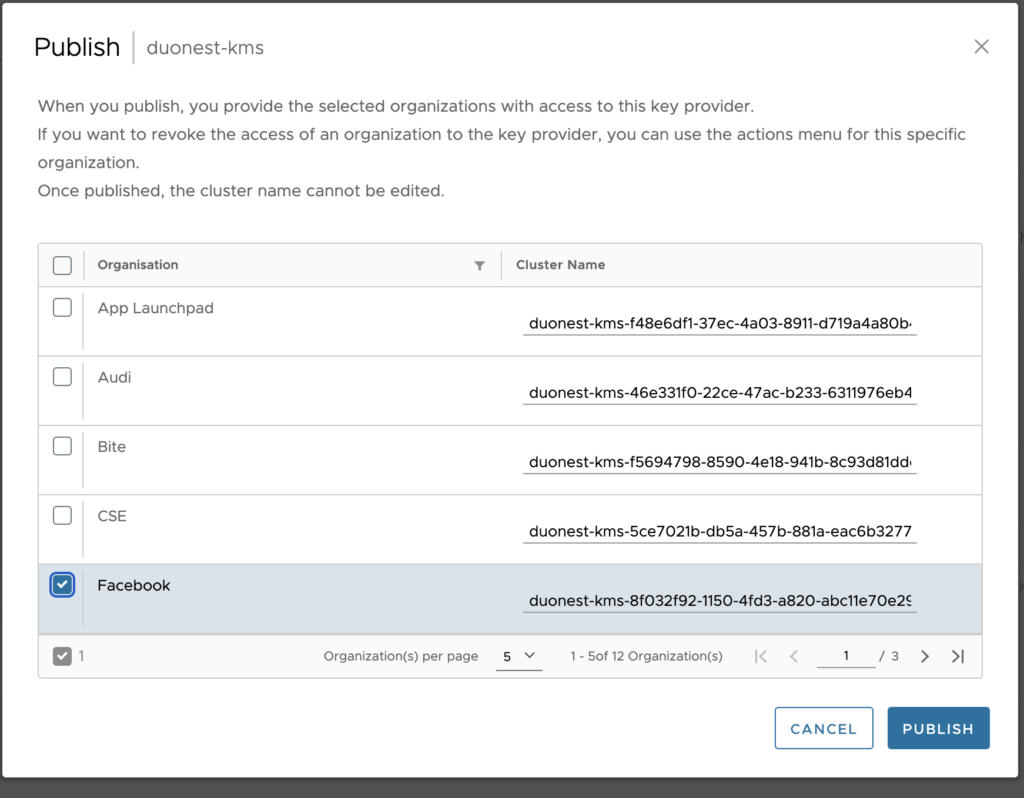
To grant tenant access to a key provider, you publish a key provider registered in VMware Cloud Director Encryption Management to a tenant organization.
- From the side navigation bar, expand More and select Encryption Management.
- Next to a key provider, click the vertical-ellipsis icon () > Publish.
- From the list of organizations, select the ones you want to publish the key providers to.
- (Optional) Under Cluster Name, enter a custom key provider name for each tenant organization.Note:After you publish a key provider to your tenants, you cannot change the cluster name of the key provider.
- Click PUBLISH.
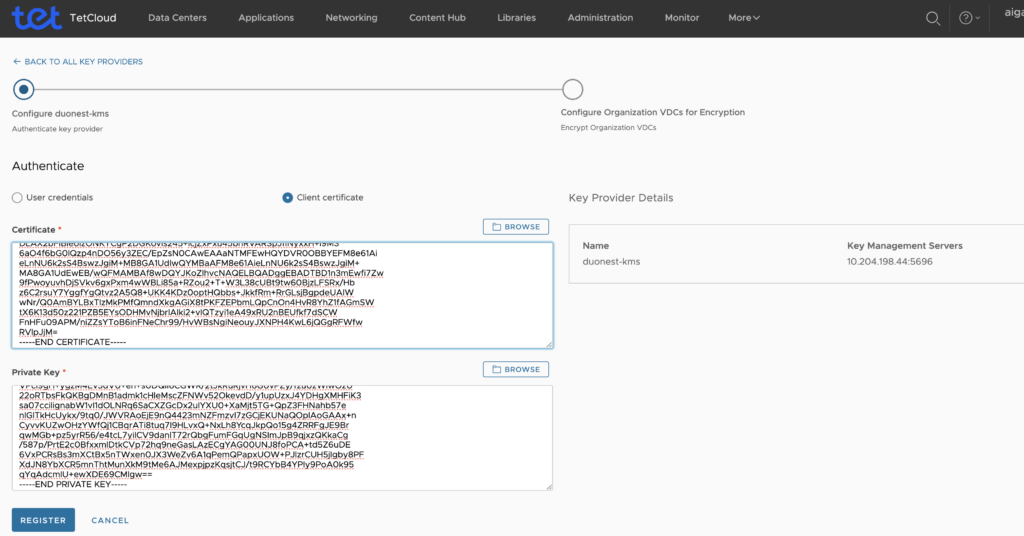
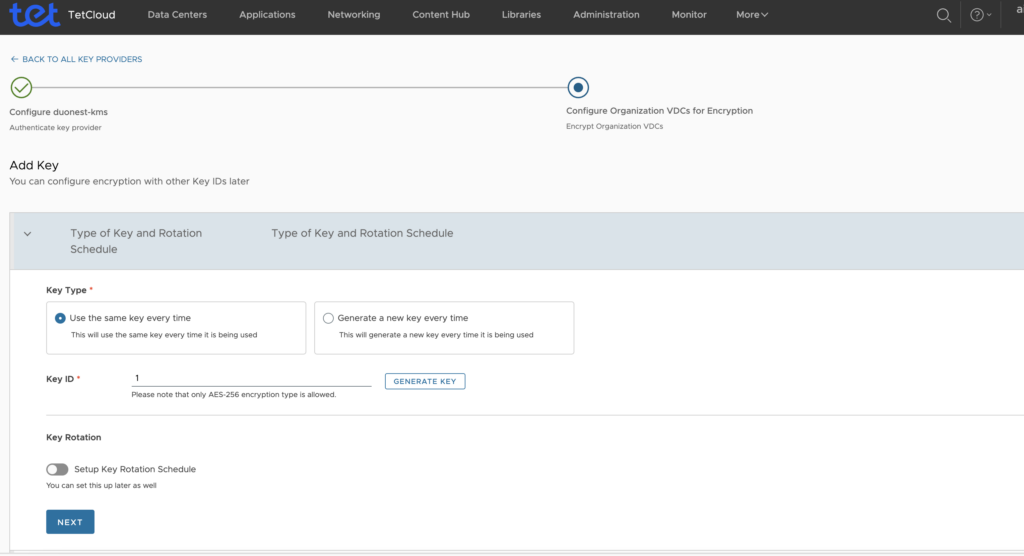
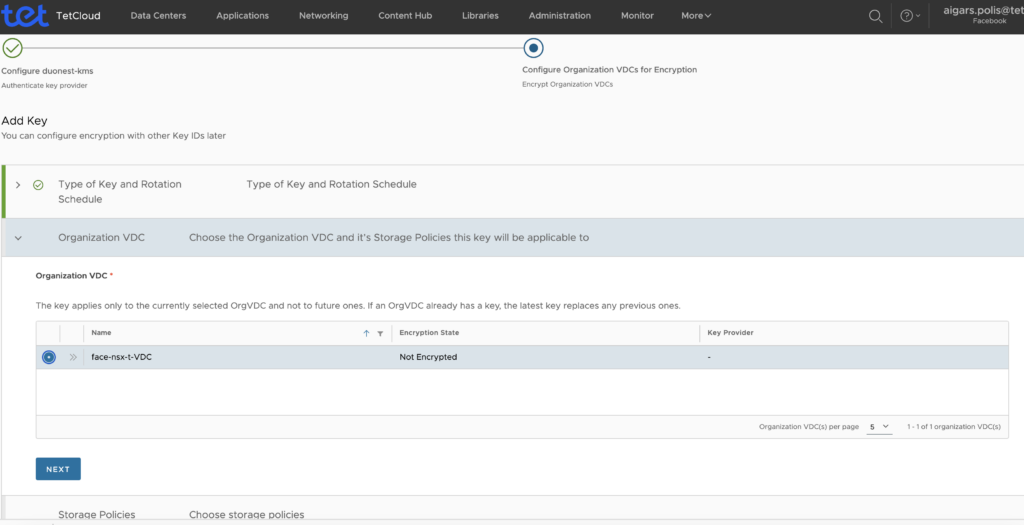
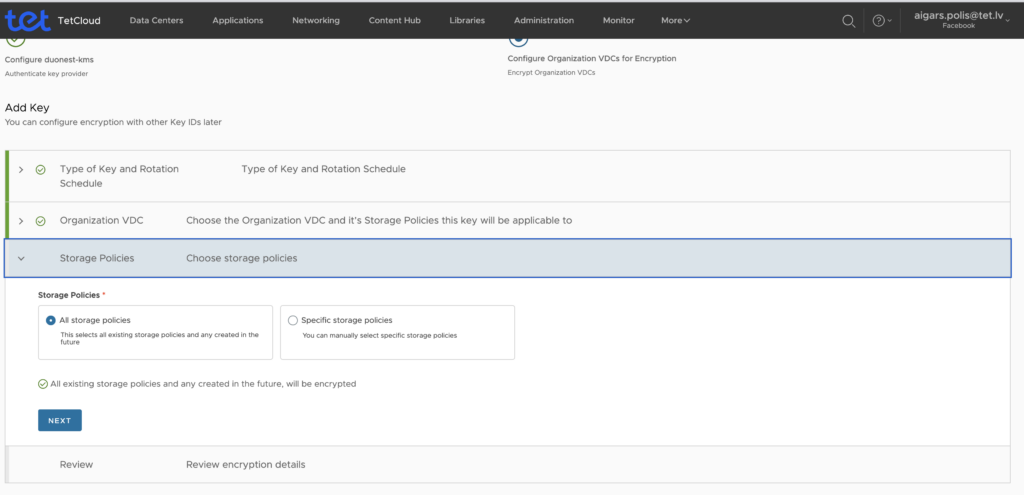
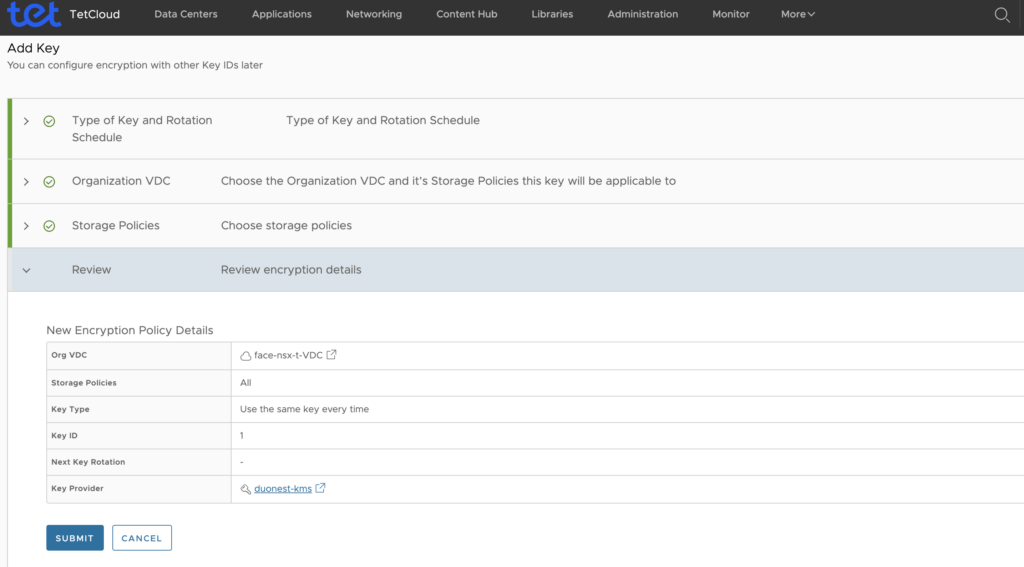
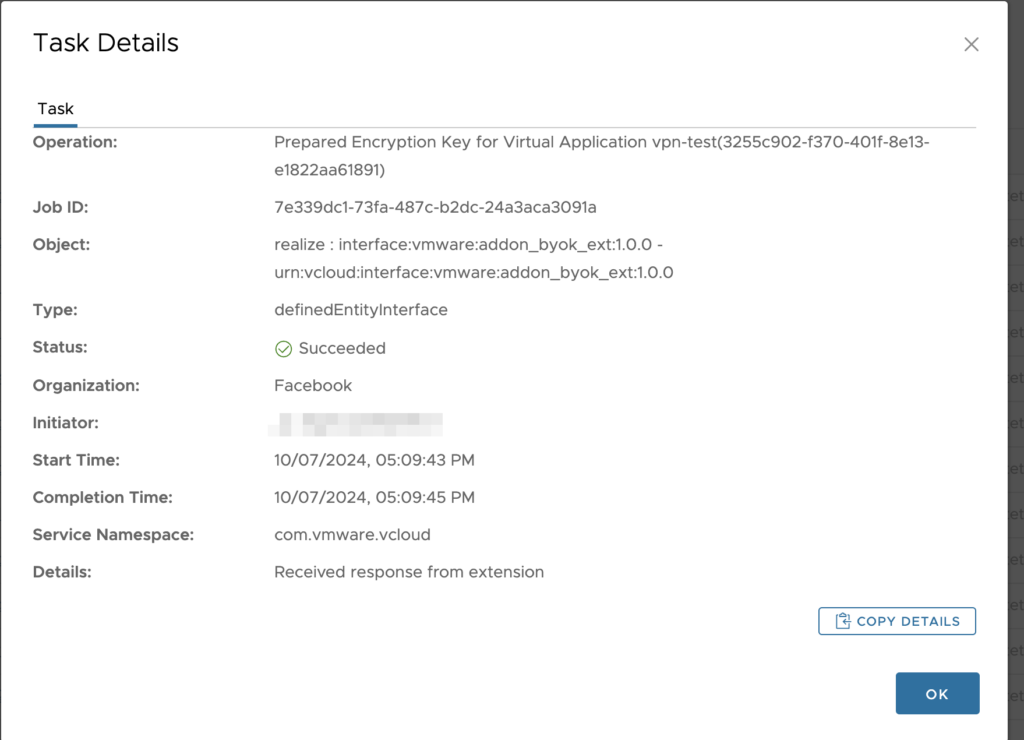
After successful operation you should see something like this showing encrypted ORG.
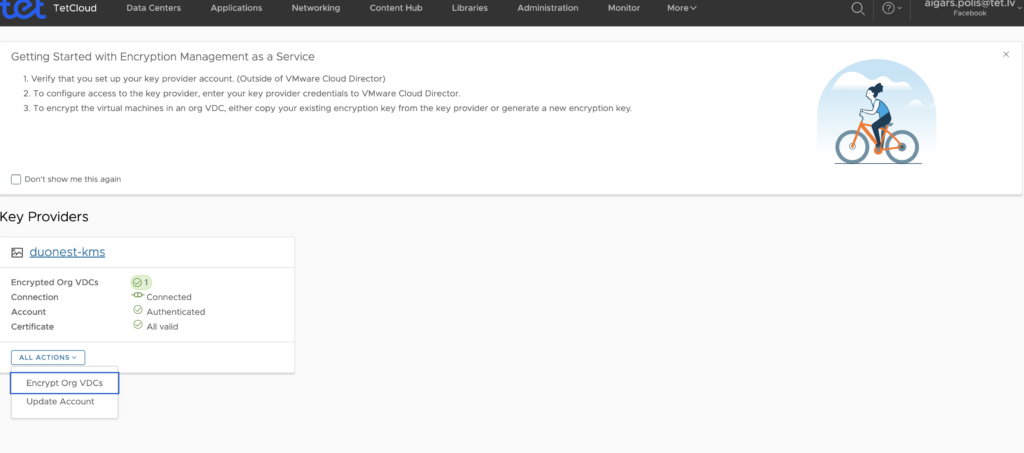
In background some encryption tasks are kicking in.
